Todos
What are Todos?
Todos are tasks that are assigned to a specific team member. They are created automatically when an Issue is created with a status of “Todo” and assigned to a team member. Todos are added to the member’s Planner, where they can be scheduled and tracked.
Todos are a unique feature of the Huly platform. You can learn more about the concept behind Todos on our blog.
Creating Todos
Todos can be created automatically or manually.
Todo automatically created for an Issue
A Todo is automatically generated by the system when an Issue is created with an assignee and the status set to “Todo”. This Todo will appear in the Planner of the assignee, and a notification will appear in their Inbox. This is the recommended way to create a Todo because it directly links to the Issue and allows for tracking of the Issue’s status, while ensuring an individual team member is responsible for the task’s completion.
Manually creating a Todo
While not considered best practice within the Huly platform, it’s possible to create a Todo that’s not associated with any Issue. Creating a Todo in this way may be helpful for a team member to manage small personal tasks that don’t directly relate to an Issue and don’t necessarily need to be visible to the rest of the team.
To create a Todo manually:
- Navigate to the Planner view by clicking on the calendar icon in the left sidebar.
- Click on the text field and enter a title for your Todo; press enter to save. Your new Todo should now appear in your Planner in the “Unplanned” section.
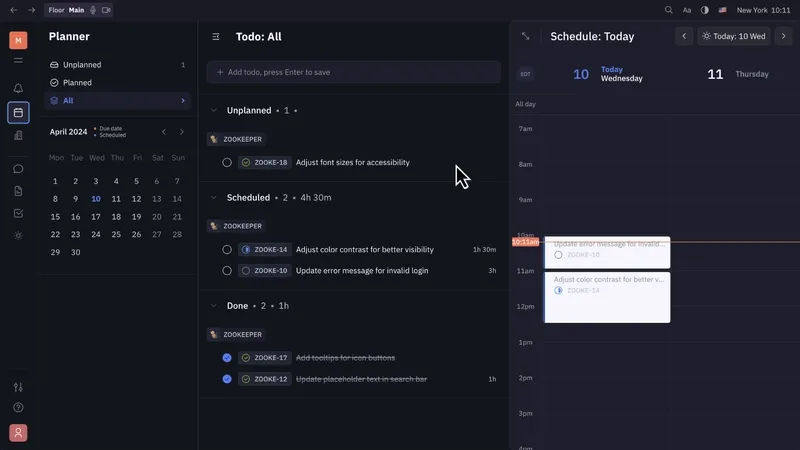
Scheduling a Todo
Todos are not particularly useful until they are scheduled. To schedule a Todo, drag and drop it from the “Unplanned” section of your Planner to a specific time slot. You can also click on the Todo to open a dialog where you can set the time slot manually.
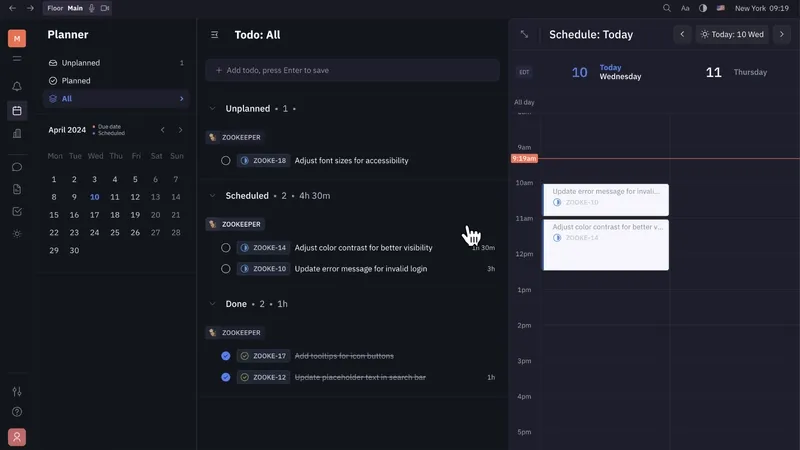
A few important things happen when a Todo is scheduled:
- The team member responsible for that Todo can view the time slot on their own Planner, allowing them to schedule their workday around their tasks.
- The scheduled Todo will become visible to the rest of the team on the Team Planner, allowing for better coordination and planning.
- The issue status will automatically change from “Todo” to “In Progress” when the Todo is scheduled.
Visibility
By default, the title and time slot of scheduled Todos are visible to everyone on the team and can be viewed on the Team Planner. However, it is possible to override this default by clicking on the Todo in your personal Planner.
The following visibility settings can be applied:
- Visible to everyone (default) - displays title and time slot on the Team Planner
- FreeBusy - displays only the time slot on the Team Planner with the title “Busy”
- Only visible to you - does not display on the Team Planner
It is recommended to keep Todos visible to everyone by default, as this allows for better coordination and planning among team members.
Any notes added to Todos in the description, however, will always be private to the assignee and will not be visible to the rest of the team.
Completing a Todo
When the task associated with a Todo is complete, the Todo can be marked as complete by clicking the round checkbox that appears when hovering over the Todo on the Planner. This will change the status of the associated Issue to “Done” and will move the Todo to the “Done” section of the Planner.