Leads
The Leads module in Huly is nearly deprecated and is disabled by default for new workspaces. We’re planning to introduce a more powerful, fully featured CRM module soon, and in the meantime, we strongly recommend waiting for the new module to take advantage of its enhanced capabilities. We do not have a specific timeframe for the release of the new module, but welcome any input at this early stage from users who would be interested in using these features in the future.
If you’re curious and would like to explore the existing Leads module, we can enable it manually for your workspace — just reach out to our support team via Slack.
Note: While you’re welcome to explore the Leads module as-is, please be aware that because the module will be deprecated, issues or bug reports related to it won’t be prioritized over other areas of Huly, and fixes and improvements are not guaranteed. With that in mind, please feel free to share any feedback you have for us to consider in planning our new CRM module.
Setting up funnels
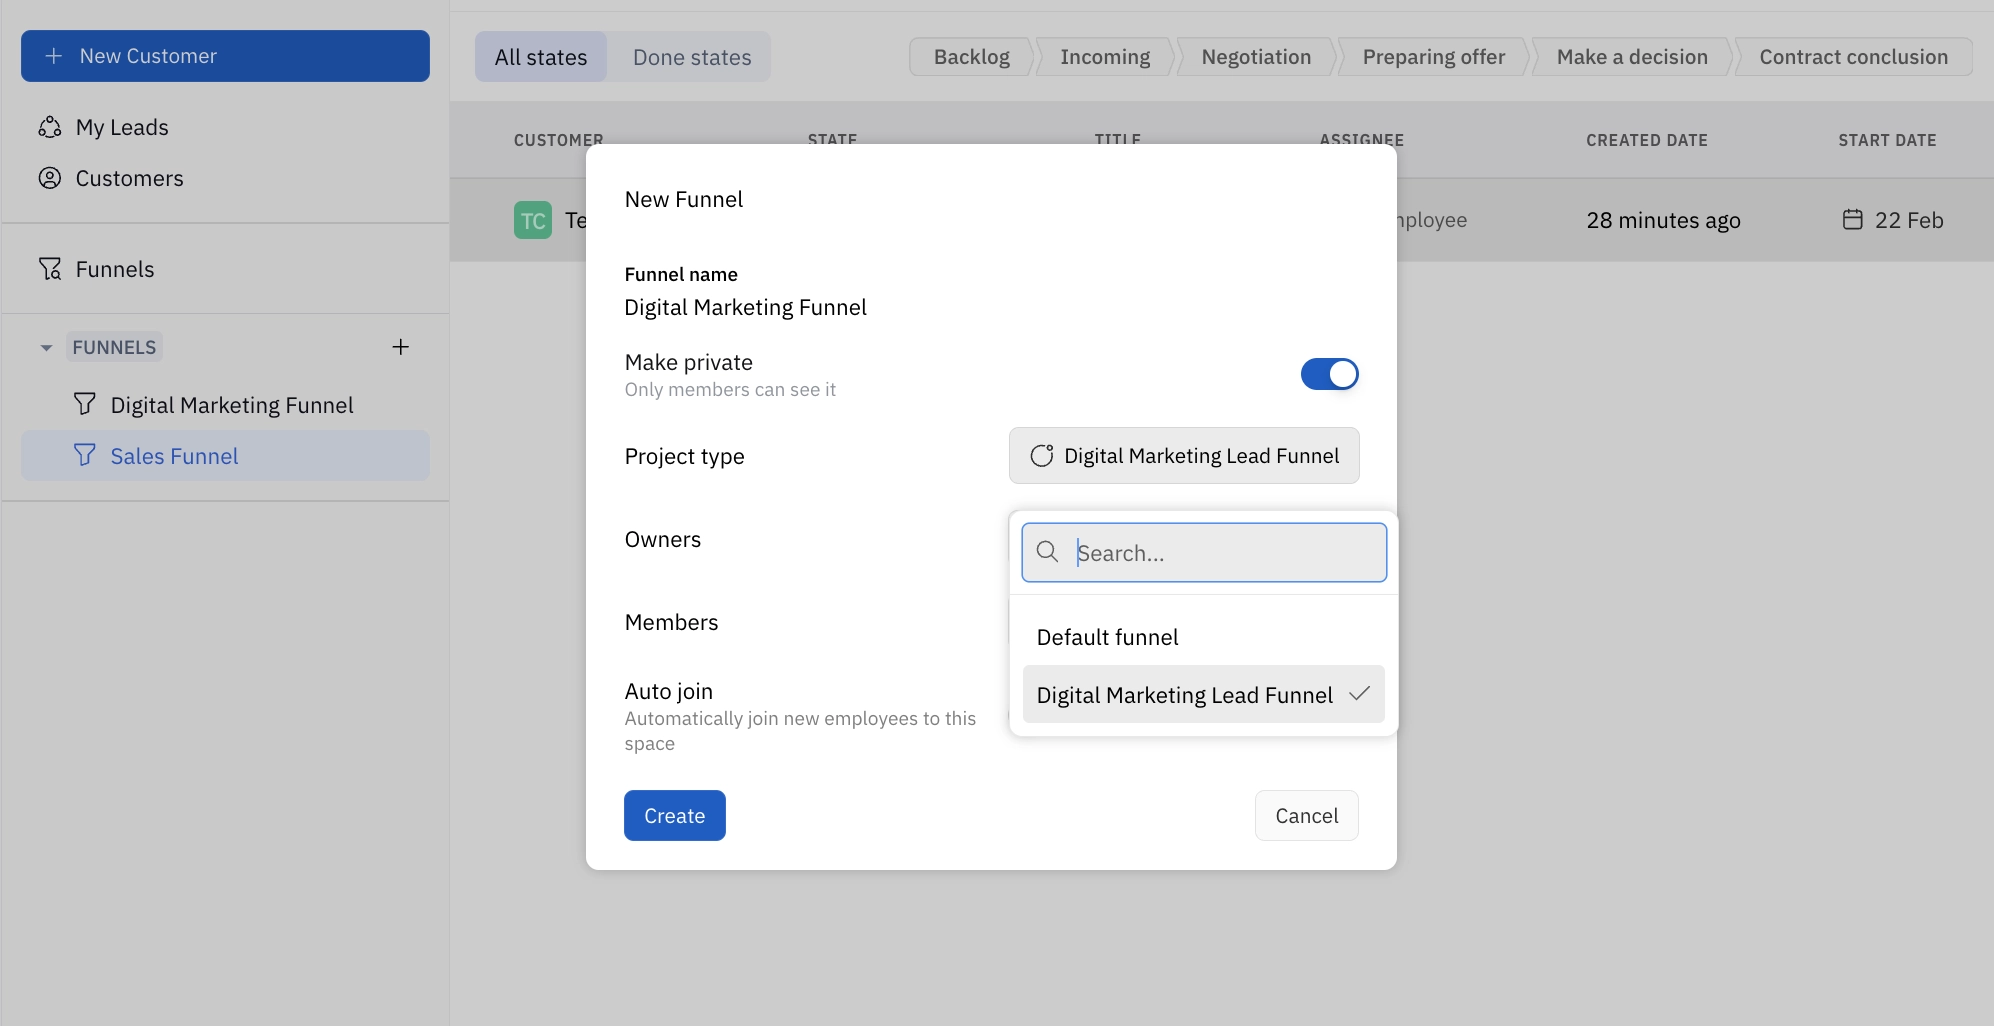
Funnels can be used to track the progress of leads through a series of stages. To set up a basic funnel with preset stages, navigate to the Leads module in the left sidebar and click Funnels in the left sidebar. Click + Funnel to create a new funnel. Here, you can enter a name for the funnel, toggle privacy settings, and select owners and members who should have access to the space. Then, click Create.
By default, funnels will have the following stages: Backlog, Incoming, Negotiation, Offer preparing, Make a decisison and Contract conclusion. You can edit these stages or create new ones in Settings.
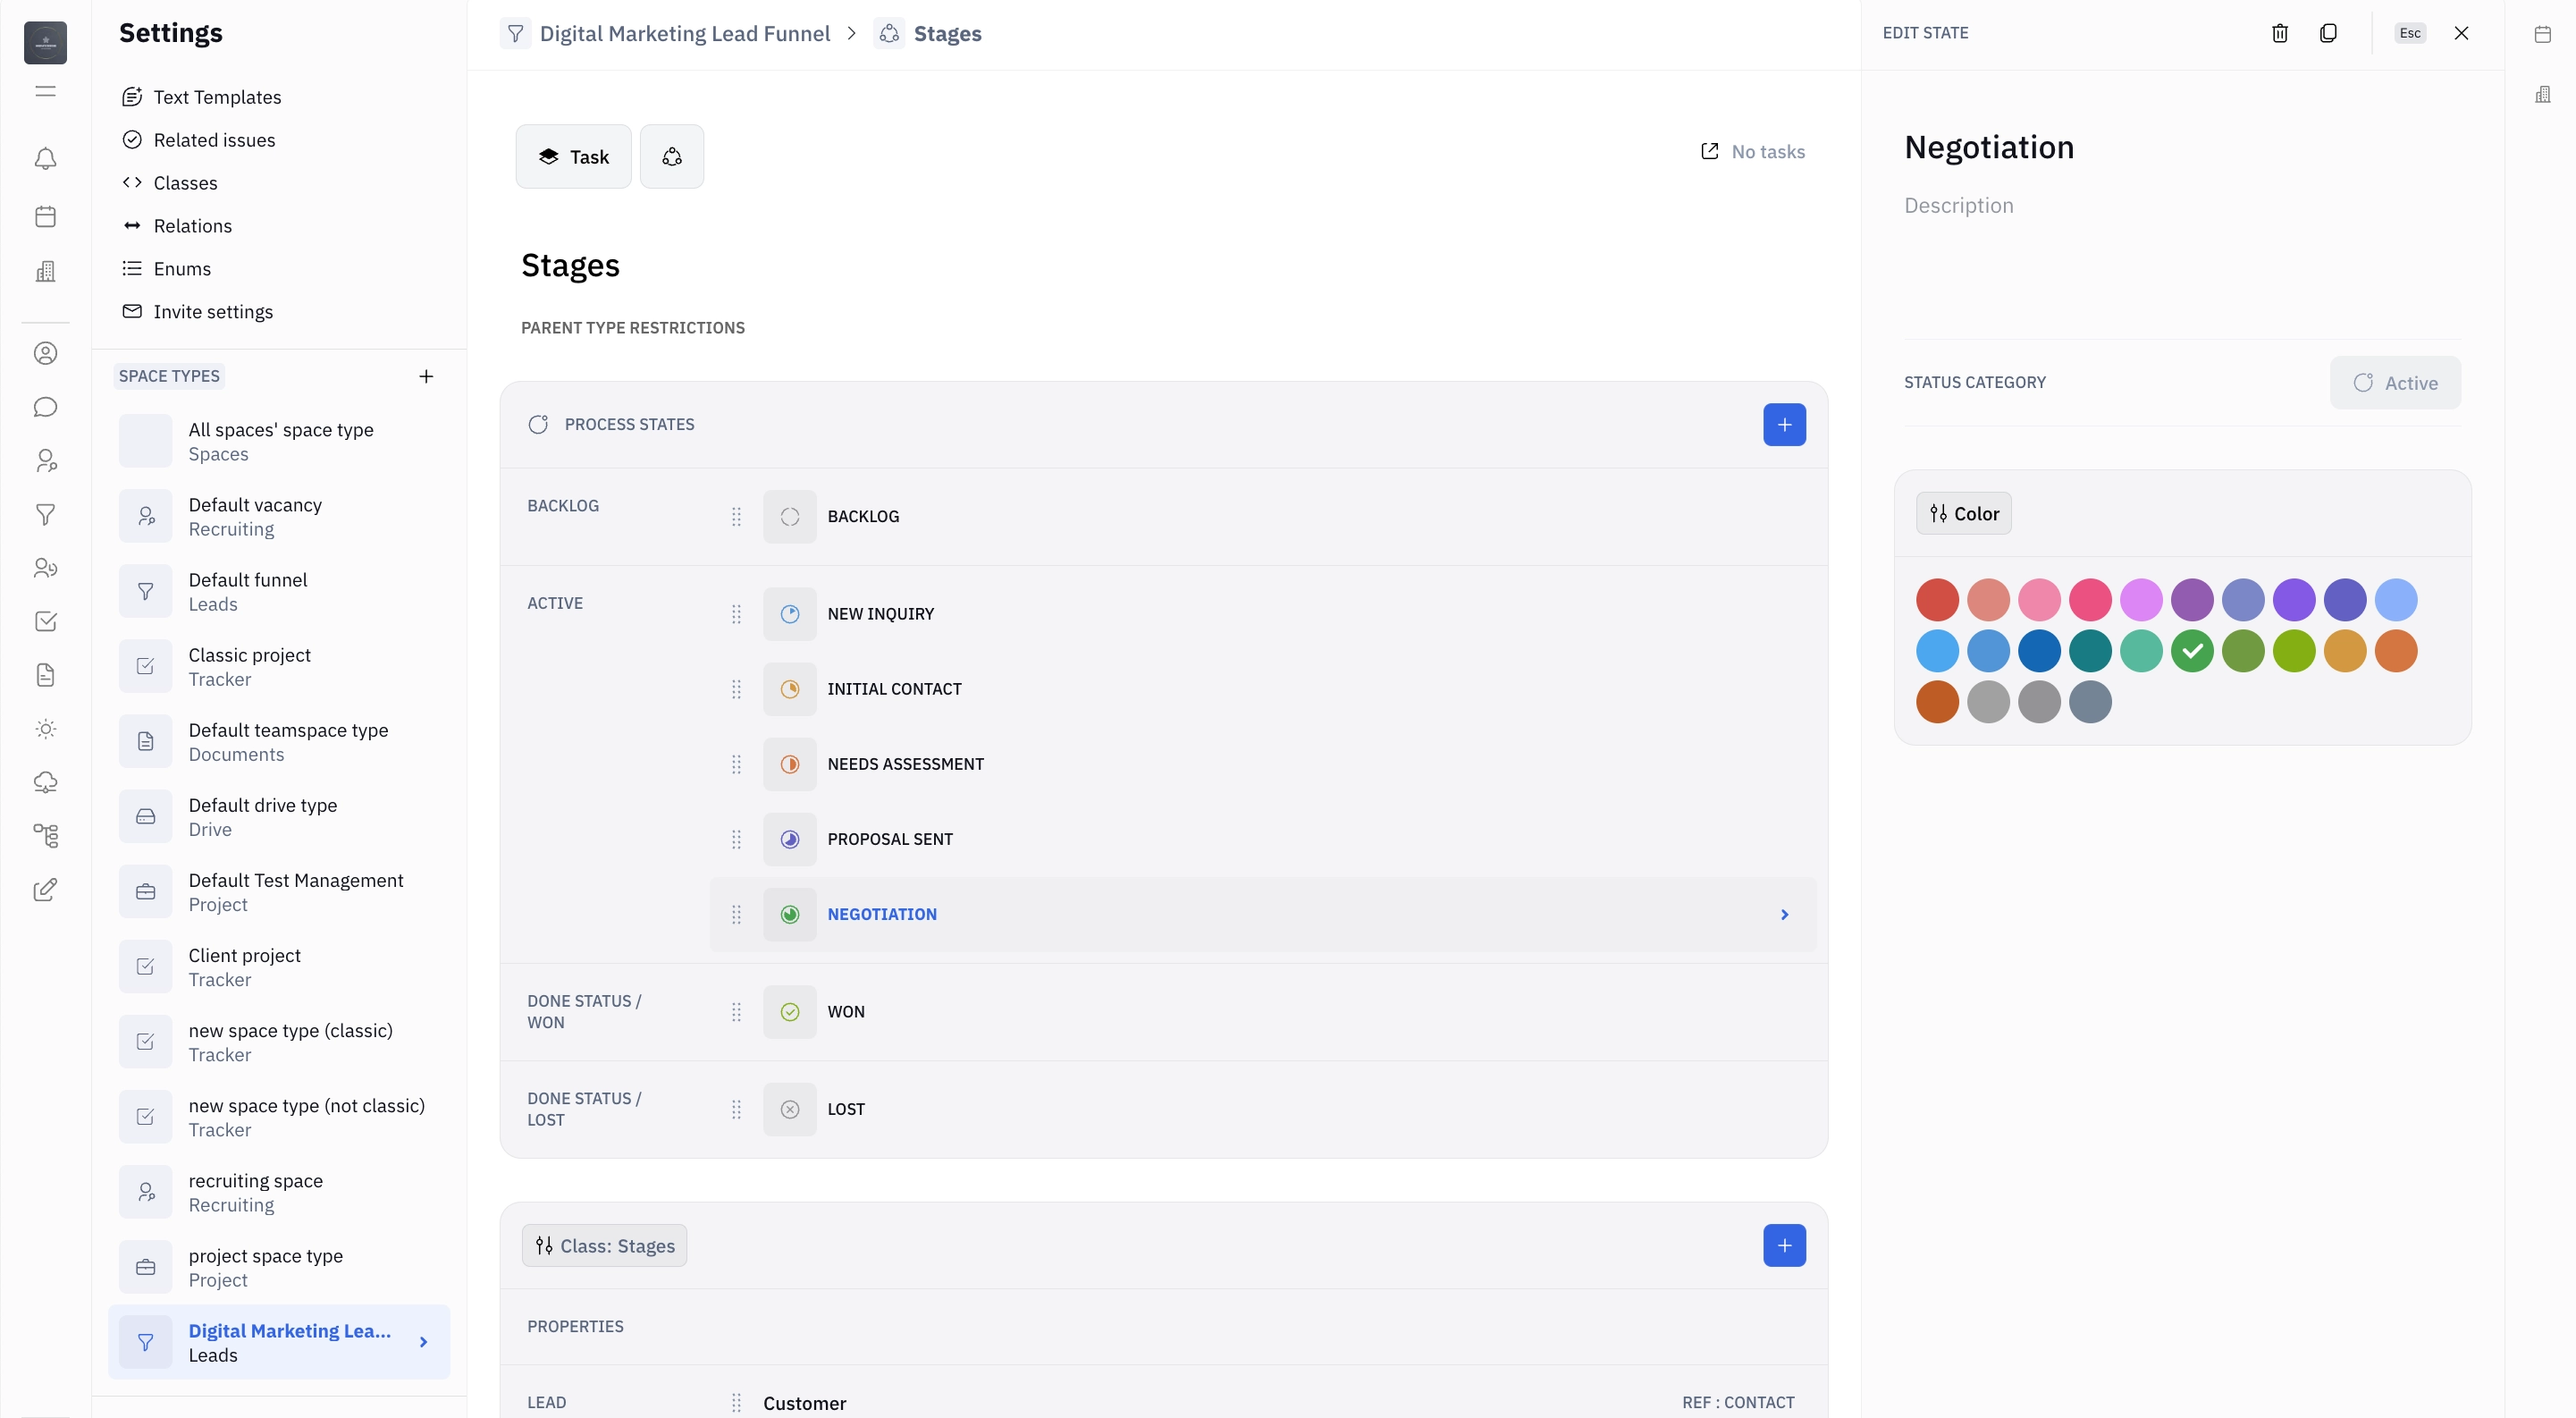
Customizing funnel stages
Navigate to Settings and find Default funnel in the SPACE TYPES menu in the left sidebar. At the bottom, you’ll see an area labeled TASK TYPES. Click on Lead. From here, you can edit, add or remove stages.
To create an entirely new set of stages (useful when managing different kinds of funnels), click the + button next to SPACE TYPES and select Leads from the dropdown menu. Enter a name for your funnel space type and click Create. You can then edit the stages in the same way as above.
Note: To learn more about creating and managing spaces, check out our guide on space types.
To use your custom funnel stages, select your funnel space type from the Project type dropdown menu when creating your funnel.
Creating and managing leads
To create a lead, navigate to the Leads module in the left sidebar and click + Lead in the upper right corner.
Enter a name for the lead and select a customer. “Customers” are anyone in your workspace contacts — this could be a company, person, or even an internal workspace member. If you do not already have a contact for your lead, you can create one by clicking the + button on the dropdown menu. Optionally enter a title (short description or label) and assignee, and select a stage for the lead. Then, click Create.
On the page for your lead, you’ll see several additional options, including due date, labels, attachments, related issues, and activity. This is where you can keep all information and discussions related to that lead. Adding a related issue is a great way to keep track of tasks related to your lead, such as follow-up calls, drafting proposals, and negotiations.
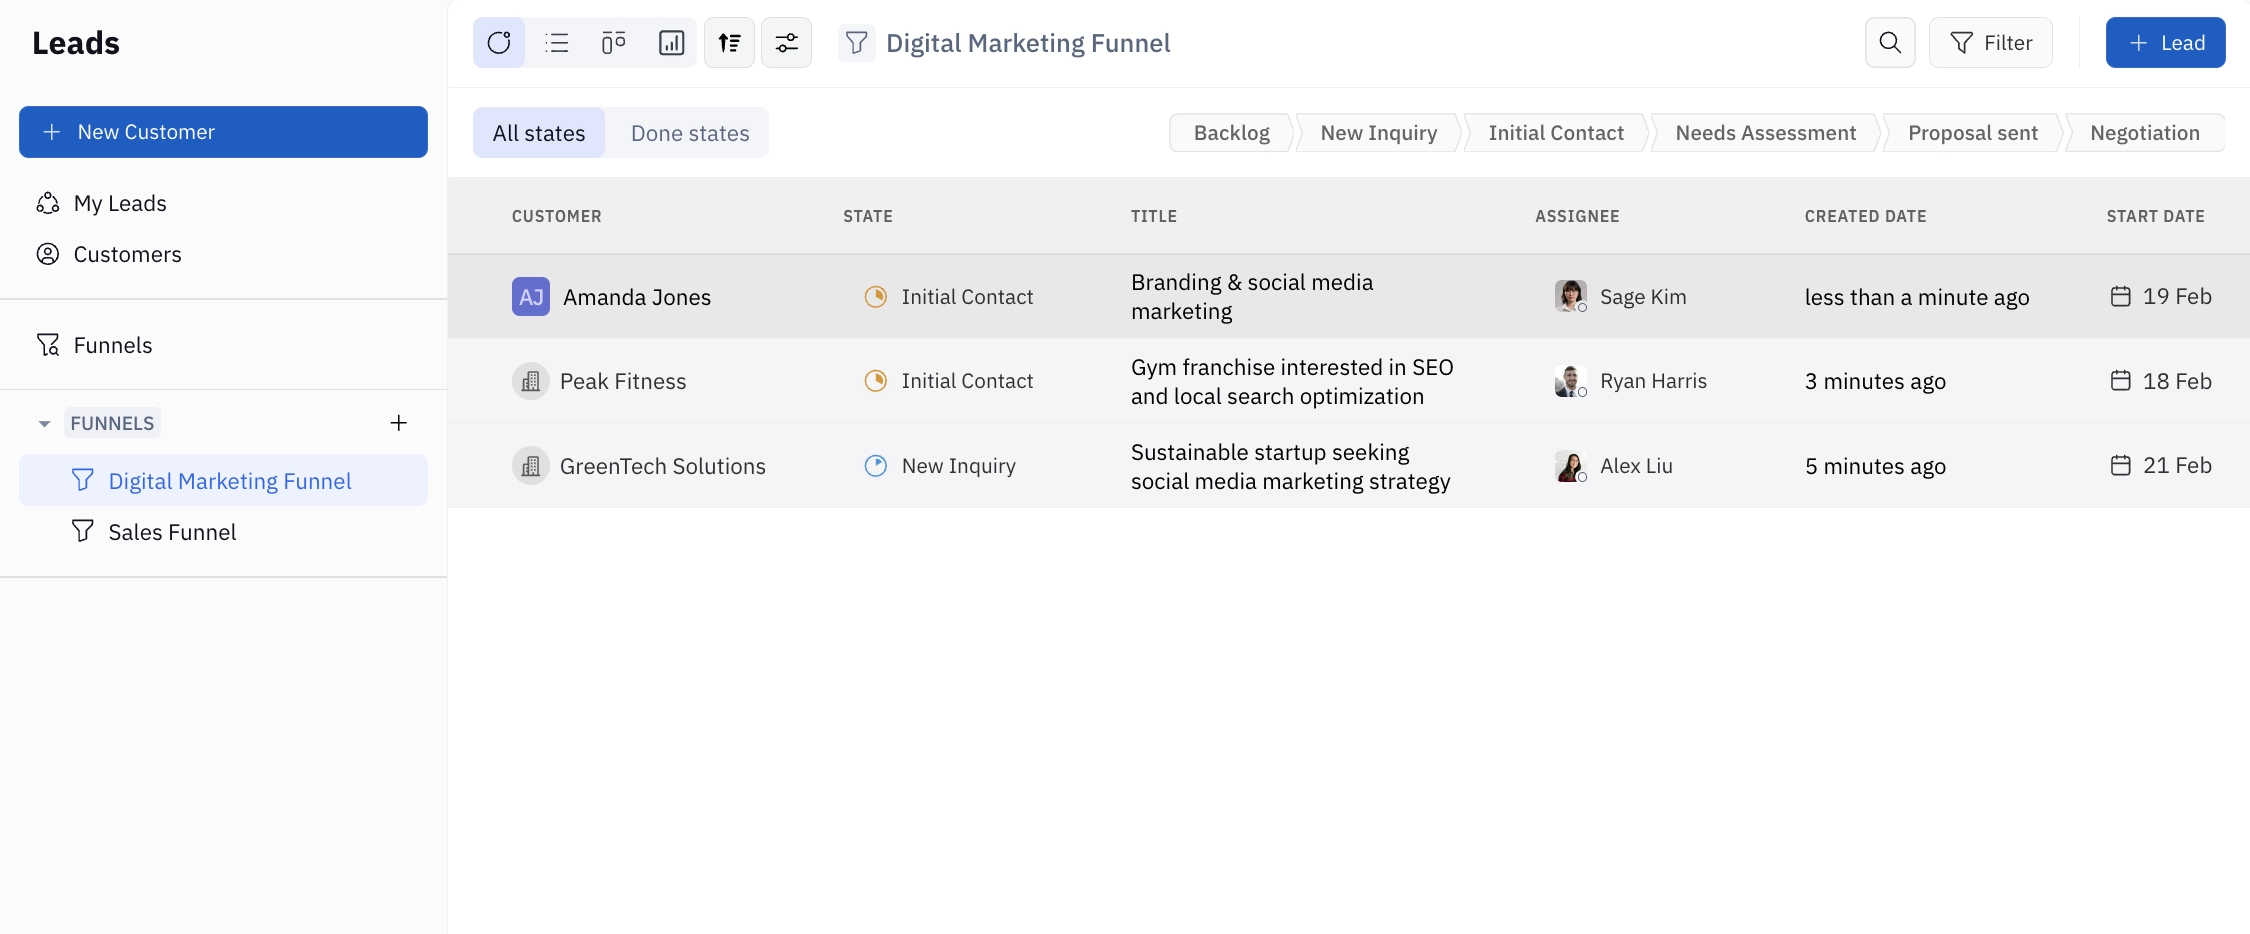
As a lead progresses through the funnel, simply update the status (stage) of the lead from the lead page itself, or by clicking the lead status in the list view.
Just like issues in your tracker, leads can be filtered, grouped and sorted by stage and assignee, and can be viewed in list, kanban, or dashboard views.
Creating and managing customers
As mentioned above, “Customers” are anyone in your workspace contacts — this could be a company, person, or even an internal workspace member. You can access these contacts easily right from the Leads module by clicking Customers in the left sidebar. In this view, you can preview the leads associated with each customer, as well as their other details and comments.
To create a new customer, click + Customer in the upper left corner. Select the type (Person or Company) from the dropdown menu, enter a name and any other details, and click Create. From here, you can open the contact page and add additional information, including a longer description, attachments, related issues, and comments. You can also add leads to the customer from this page by clicking the + button in the Leads section.