Roles and permissions
Roles and permissions can be used to restrict access to spaces and allow additional permissions to select members. Permissions can be controlled at various levels:
- Workspace owners and maintainers - high-level control over who can make major changes like deleting the workspace and adding/removing team members.
- Global admins - extended permissions for members to archive and delete projects in the workspace.
- Space type roles - specific roles that can be used to toggle update, archive and delete permissions for users, customized by space type.
- Space members - permissions for each individual space — simply add members and toggle privacy settings to determine exactly who can access which spaces in your workspace.
Workspace owners and maintainers
Navigate to Settings and select Owners from the WORKSPACE SETTINGS menu.
From here, you can select a role for each team member:
- Owner - The workspace owner has full control over the workspace. They can remove team members and manage workspace settings. A workspace can have multiple owners.
- Maintainer - Maintainers have the same permissions as owners, except they cannot delete the workspace, remove owners, or remove team members. Maintainers cannot change their own role in the system. Maintainers can manage workspace settings.
- User - Users cannot manage workspace settings, change their own role, or remove team members.
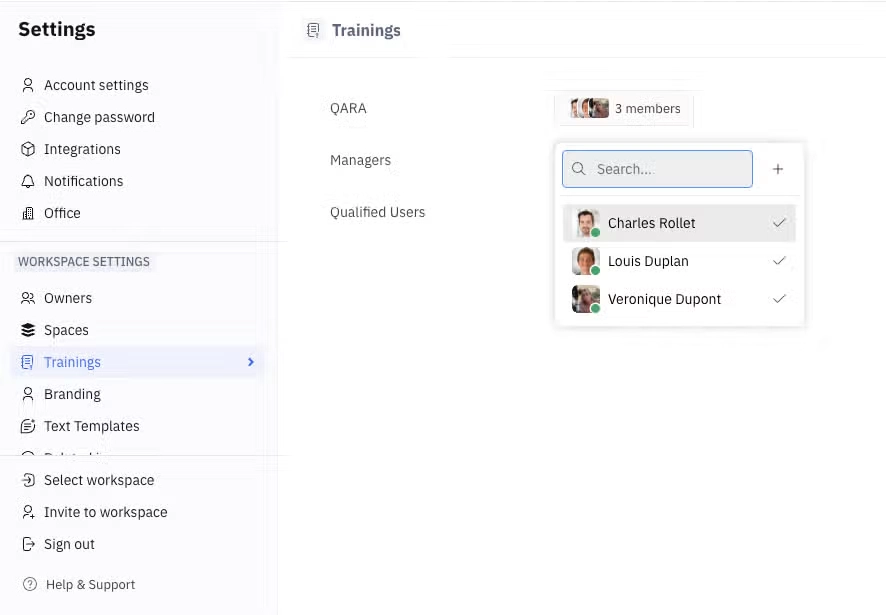
Note: TraceX workspaces come with additional roles:
Qualified User,Manager, andQARA. These roles are used to manage permissions for controlled documents, products, product documents and trainings.
Spaces admins
You can also set admins globally for all spaces within the workspace. Global admins have full permissions when it comes to spaces themselves, such as archiving and deleting projects, but they cannot delete the workspace, remove the workspace owner, or manage workspace settings (unless granted Owner or Maintainer permissions at the workspace level - see above).
To set a global admin, navigate to WORKSPACE SETTINGS in Settings and select Spaces. From here, you can add or remove admins.
Space type roles
Roles can also be set for a space type. In Settings under the SPACE TYPES menu, navigate to the space type you’d like to manage and find the Roles section. Then, click the + button. Enter a name for your role and click Create. Then, click on your role to select specific permissions.
Once your roles have been created, you’ll be able to assign roles to team members for spaces using that space type.
TraceX workspaces come with some special permission built in. The default roles of Qualified User, Manager, and QARA can be customized for your specific needs. Navigate to your workspace settings and open the space that you want to customize — Default Documents, Default Trainings or Default Products. From here, you can add or delete roles and edit their names, and add or remove permissions.
Space members
Permissions can also be set for individual spaces, such as projects, teamspaces, drives, and more.
All spaces with a Make private toggle can be restricted to allow only members to view the space. This toggle can be set at the time of creating the space, or when editing the settings later.
In order to restrict access to only members, ensure Make private is toggled on, and select the members you’d like to have access to the space.
In the example below, you can see that this project space is set to private, and 7 members have been selected to have access to the space.
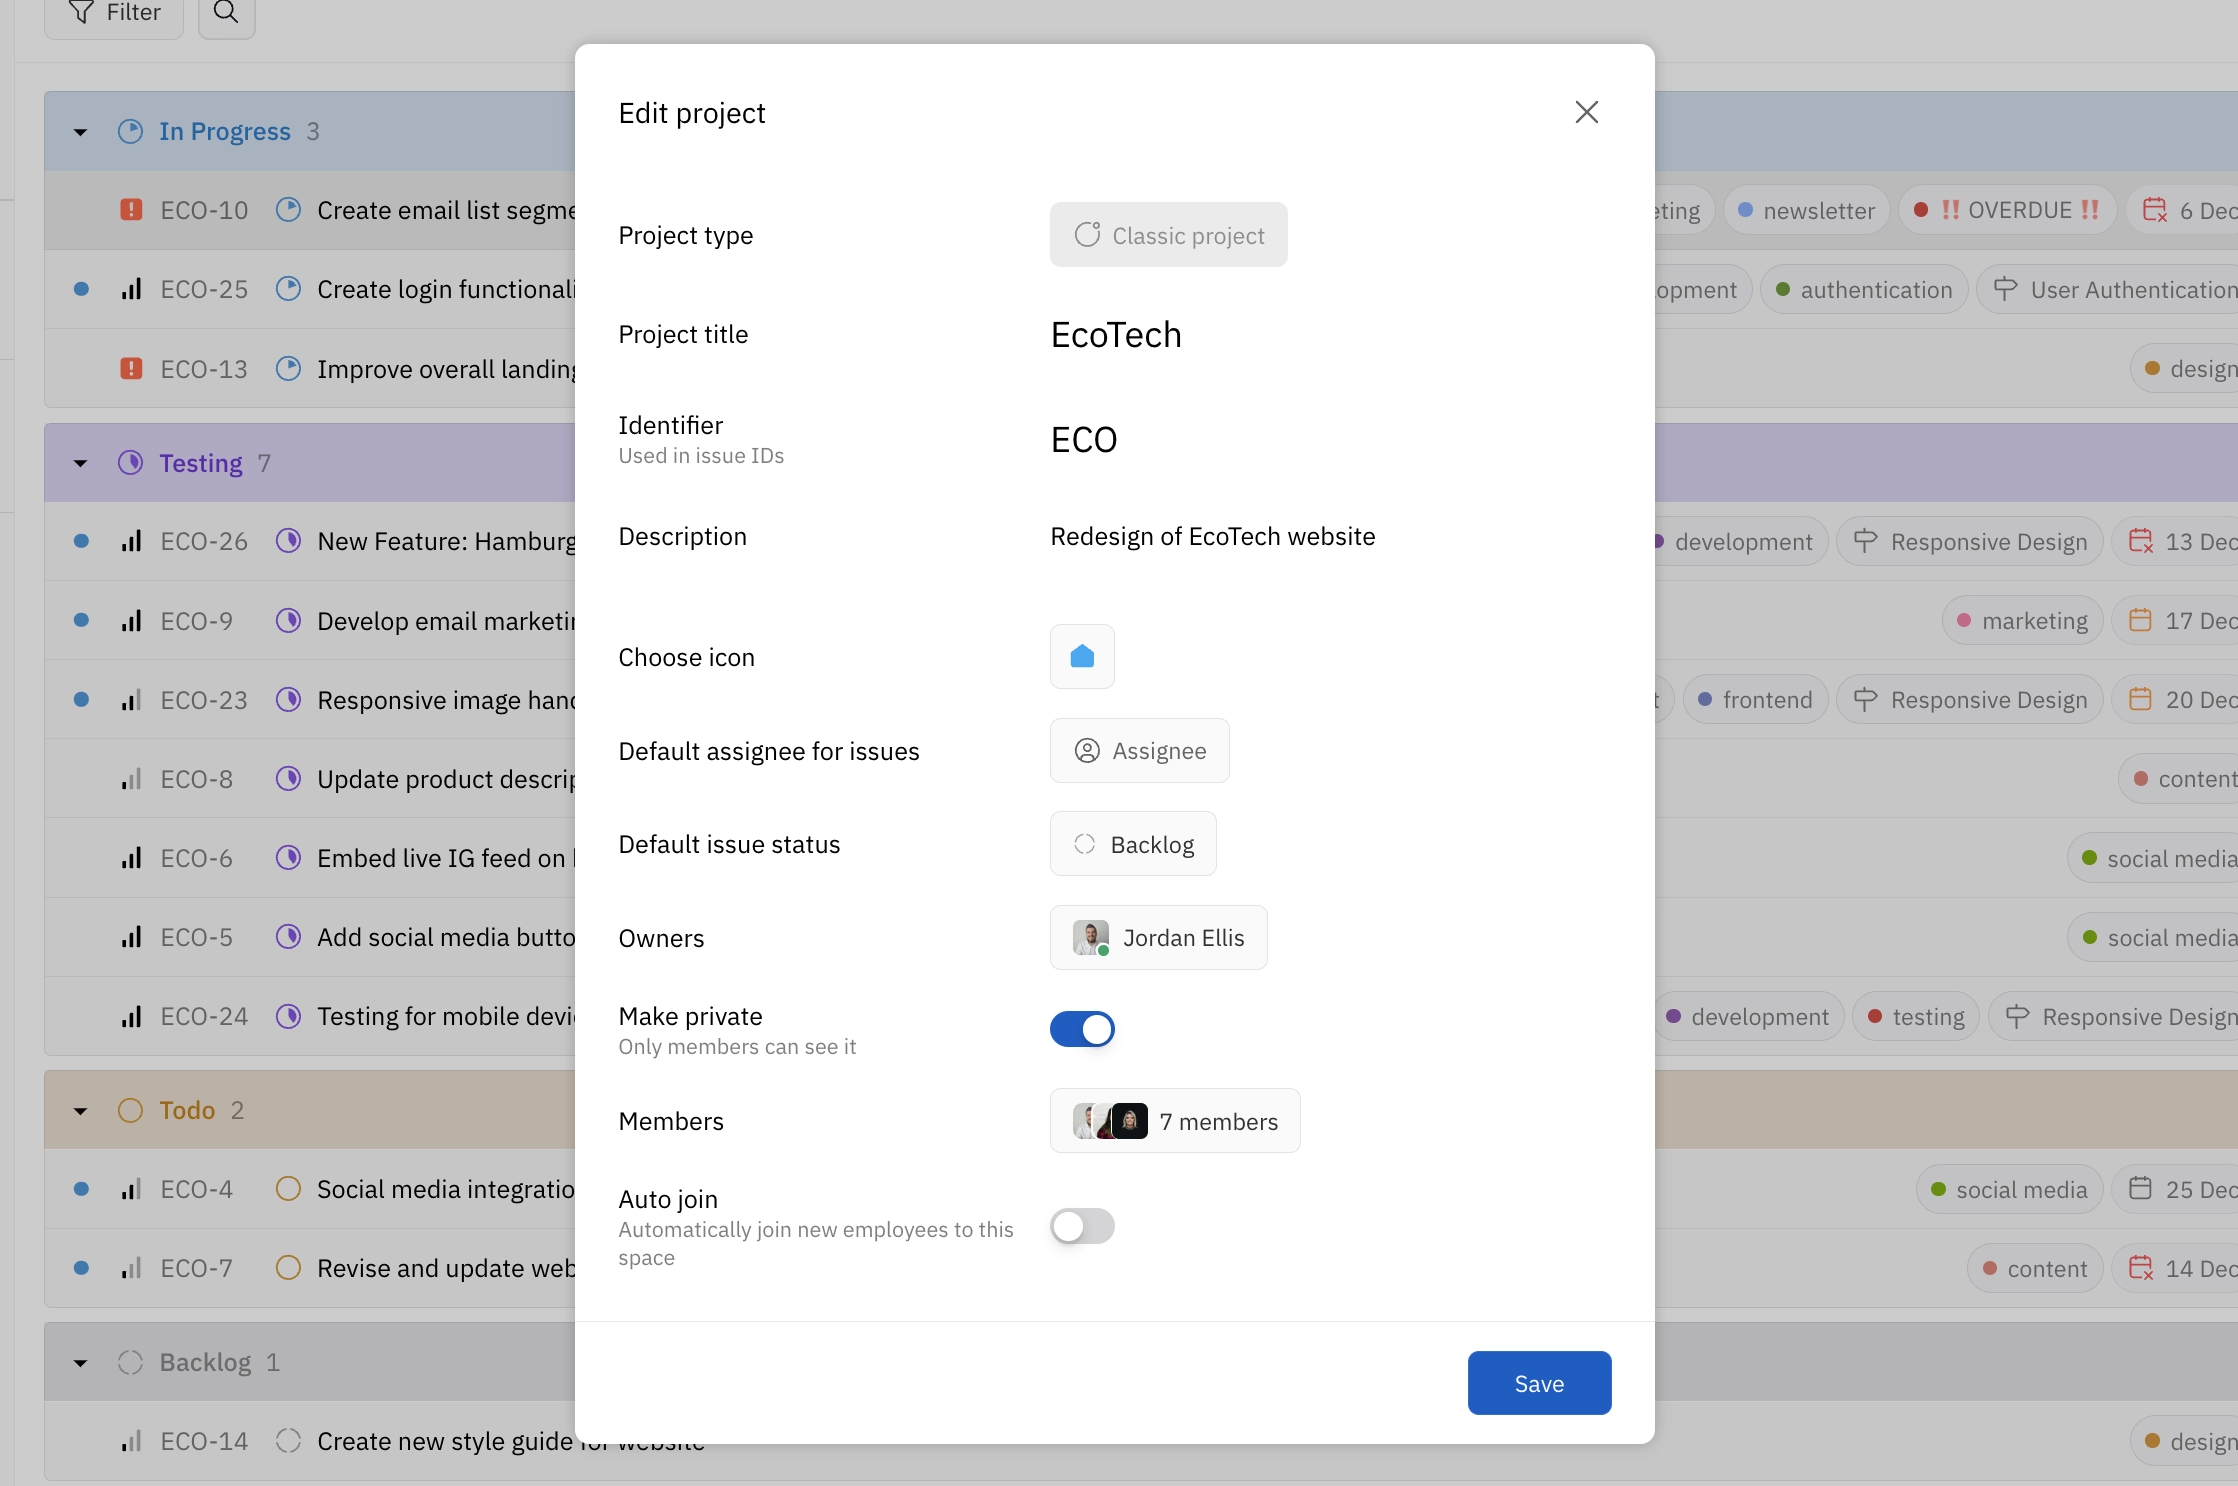
If a space is not set to private, any member of your workspace will be able to join the space. This means that you don’t need to manually add members to the space when creating it. However, if members are not added to the space, they will not see it in their left side menu by default — they will have to find the space on the list of spaces and join it themselves. For this reason, you may want to consider adding members to the space when creating it to ensure it automatically appears in each member’s left side menu.
Note: If
Auto joinis toggled on, new workspace members will be automatically added to your private space, even if you haven’t specifically added them to the list of members. If you’d like to restrict access to only the members you’ve selected, ensureAuto joinis toggled off.
Assigning roles
How you choose to assign roles to your users will depend on the kind of module you’re working with, and the steps are slightly different for each. Continue reading to see how roles can be assigned for Controlled Documents, Products, and Trainings.
Controlled Documents: Open the settings menu for any document space and select Edit documents space. From here, you can first add members to the space and then assign members to each of the available roles.
Products: Roles can be assigned when creating a product by selecting members from each role dropdown menu.

To assign roles from a product that’s already been created, use the right side panel to add members to each role.
Trainings: Open your workspace settings and select Trainings. From there, you can assign roles to team members using the dropdown menus.