Task types
Huly is designed to be highly configurable to any kind of workflow. While some customization features are still being developed, there are several options already available for you to configure your workspace to your specific needs.
What are task types?
Task types define the kinds of tasks inside your projects. A task type can have its own special properties and process states.
To take a look at the default task type used in your Tracker, navigate to Settings and select Classic project from the SPACE TYPES area in the left sidebar menu. Classic project is the default space type used in Huly.
Notice in the TASK TYPES section that one task types are listed: Issue. Opening this task type will reveal its properties and process states.
The Issue task type has process states of Backlog, Todo, In Progress, Done and Canceled.

Note: If you’ve already connected your workspace to GitHub, you’ll also see a
Pull requesttask type. These tasks are synced with GitHub, so they have their own unique properties and process states.
Process states
Process states are the stages that a task goes through in its lifecycle. Each task type can have its own set of process states. The Huly system will automatically move tasks between these states based on user actions. The following actions will trigger automatic state changes:
- Scheduling an action item - When the issue assignee schedules an action item connected to that issue, the issue status will change from “Todo” to “In Progress”.
- Completing a scheduled action item - When the issue assignee checks off an action item as complete (after scheduling it in their Planner), the issue status will change to “Done”.
Even if you customize your process states to use different names (see below), the system will still recognize these actions based on the Status category of the process state. For example, you could change the name of the process state from “In Progress” to “Actively Working” and as long as the Status category is set to “Active”, the system will still recognize this state as the one that triggers the automatic state change.
Creating custom task types
In order to use your own customized task types and process states, you can either modify the default task types on the Classic Project, or create a new space type. Either way, this can only be done by the workspace owner or maintainer.
To create a new space type, navigate to settings and click the + button next to SPACE TYPES in the left sidebar menu.
Select the space type you’ll be basing your new space type on; in this case, you’ll select Tracker. From here, you can enter a name for your space type (for example, “Custom Tracker”), and choose whether or not to base your space type on the Classic project (recommended). Then, click Create.
Find your new space type in the left sidebar menu. From here, you can add members to the space type and toggle whether new workspace members will be automatically added to this space type.
Click the + button in the TASK TYPES section. Enter a name for your new task type (for example, “Issue” or “Task”), choose whether this type can be used for sub-tasks, and click Create.
The steps for creating and modifying task types in the Classic Project are the same.
Creating custom process states
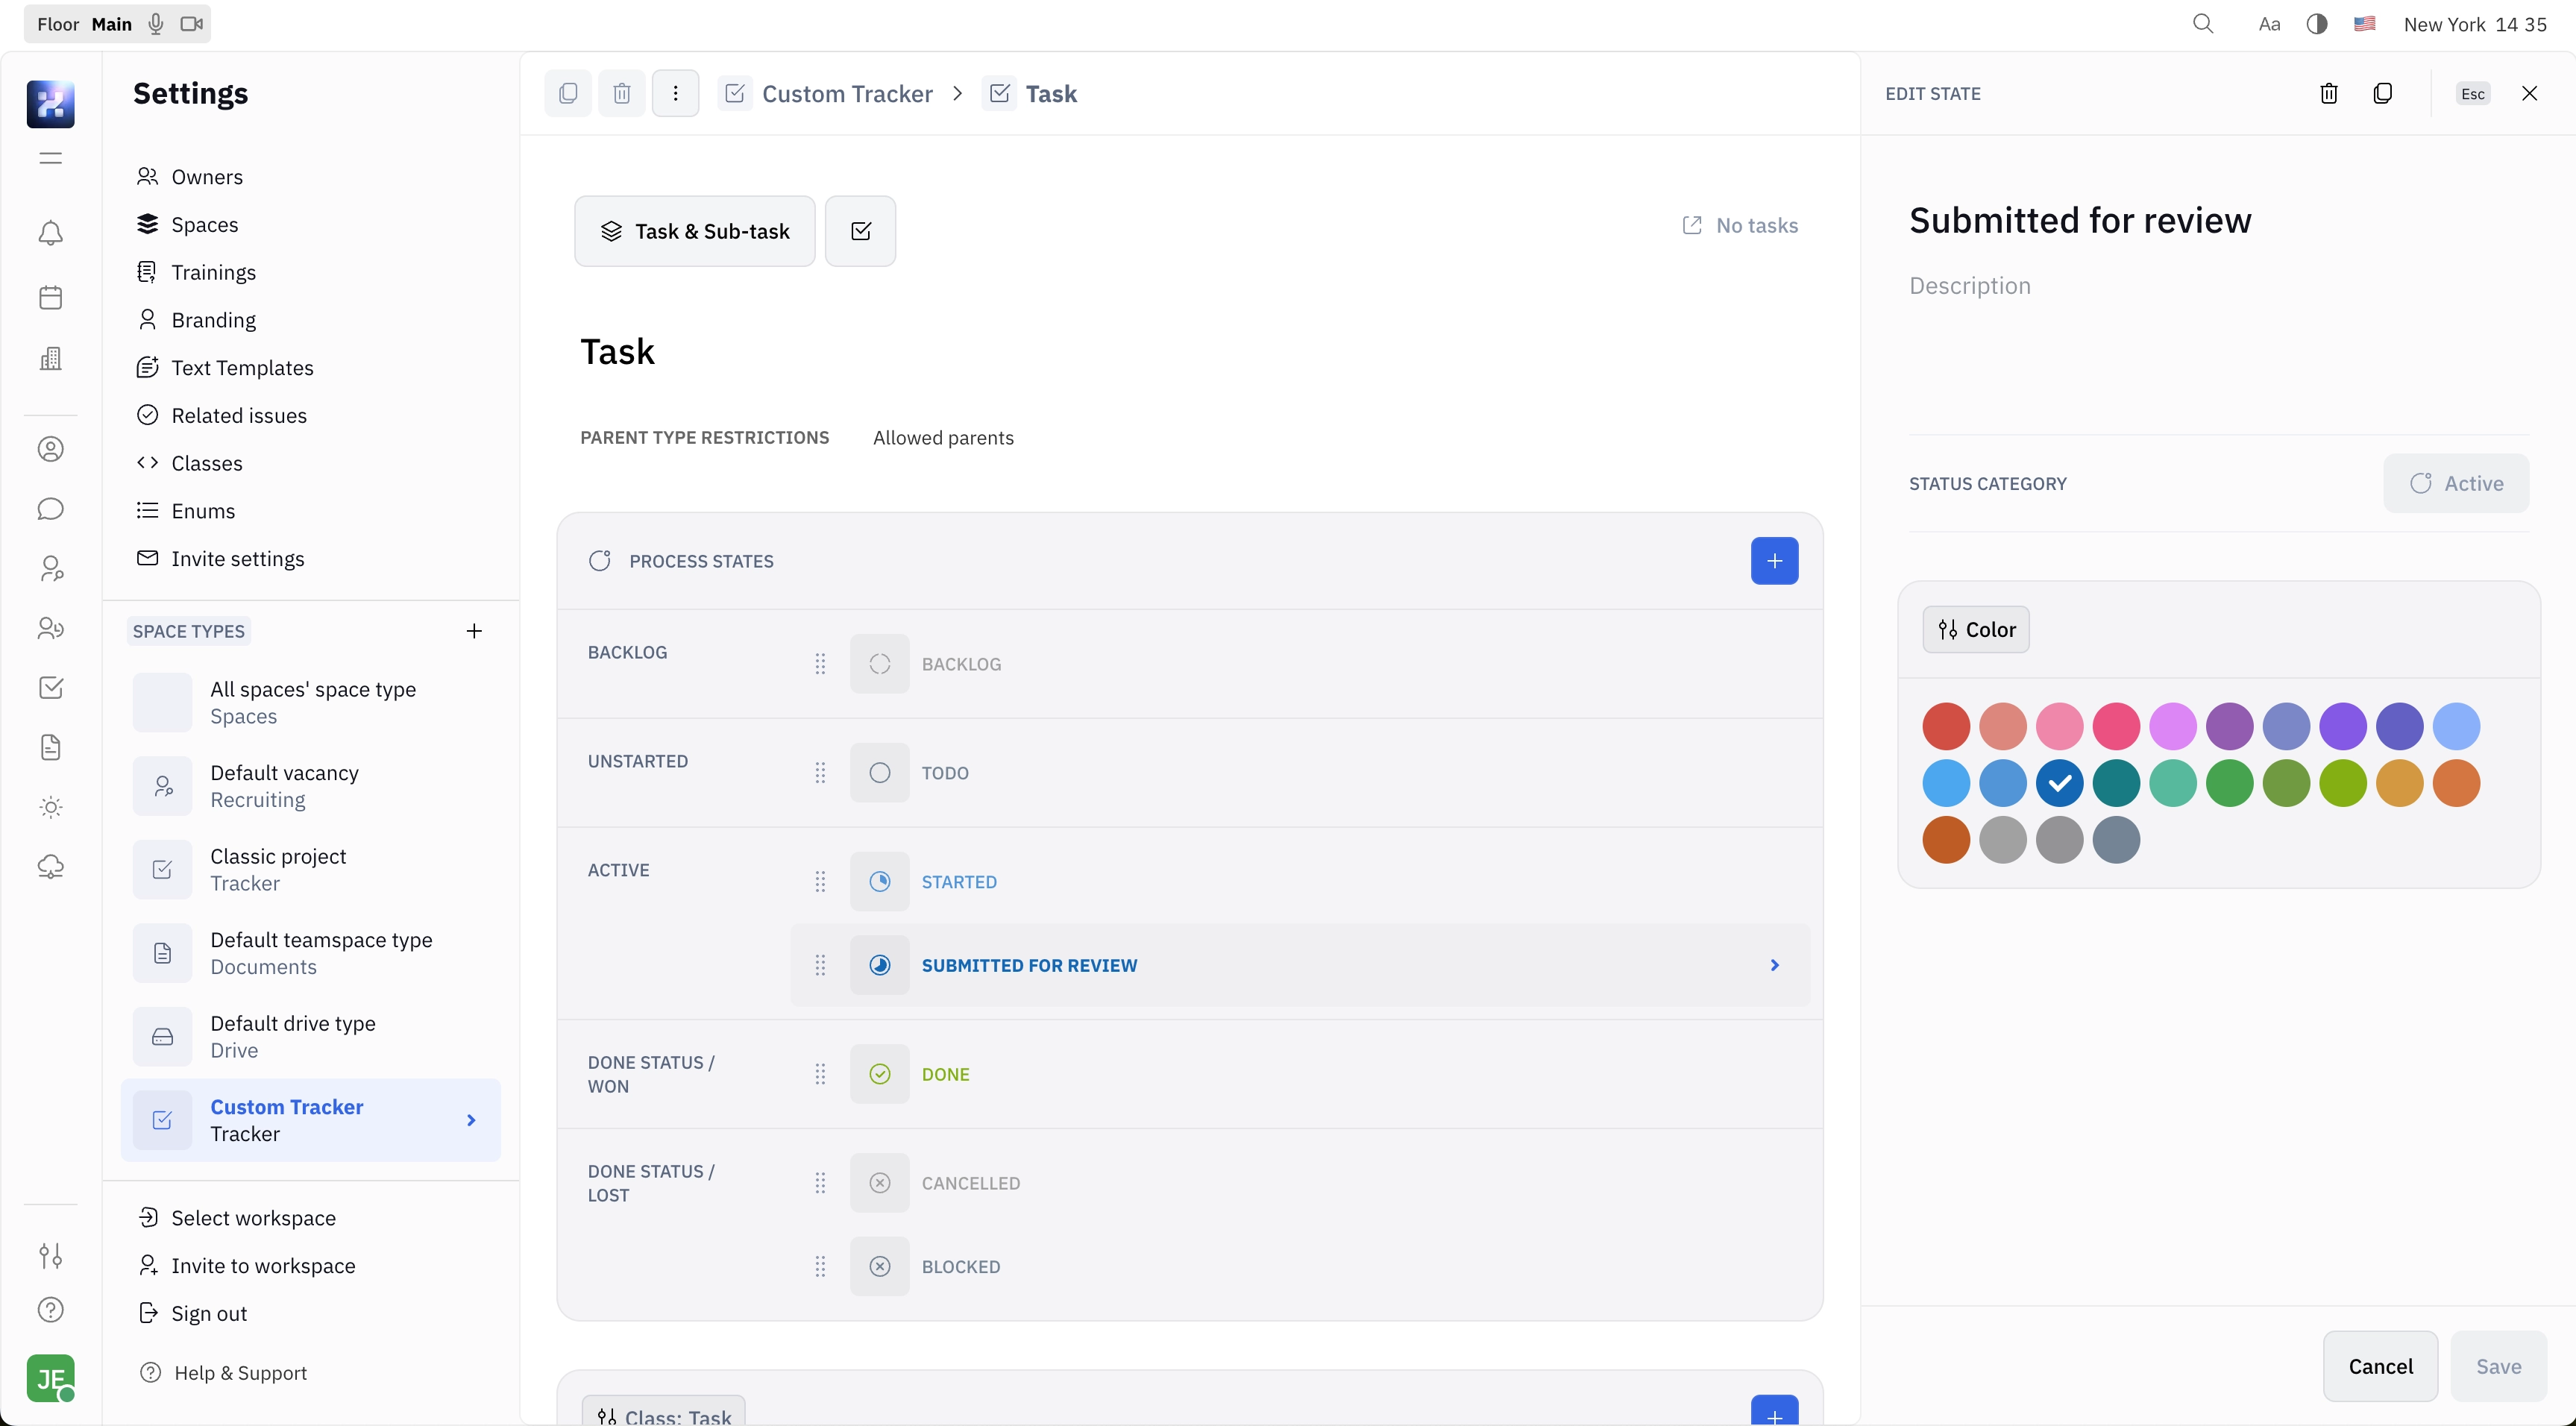
Open your new task types to create your custom process states. You’ll see placeholders for each category, each of which can be edited to your specific needs.
Click on any process state to edit it. You can change the name of the state, the color associated with it, and the status category. The status category is used to trigger automatic state changes based on user actions.
You can also create new process states. For example, within the “Active” status category, you may wish to add more states, such as “Started” “In progress”, “Submitted for review” and “Under review”. You might also want to add more specific states to the “Done status/lost” category, such as “Cancelled”, “On hold” or “Blocked”.
Using your custom task types
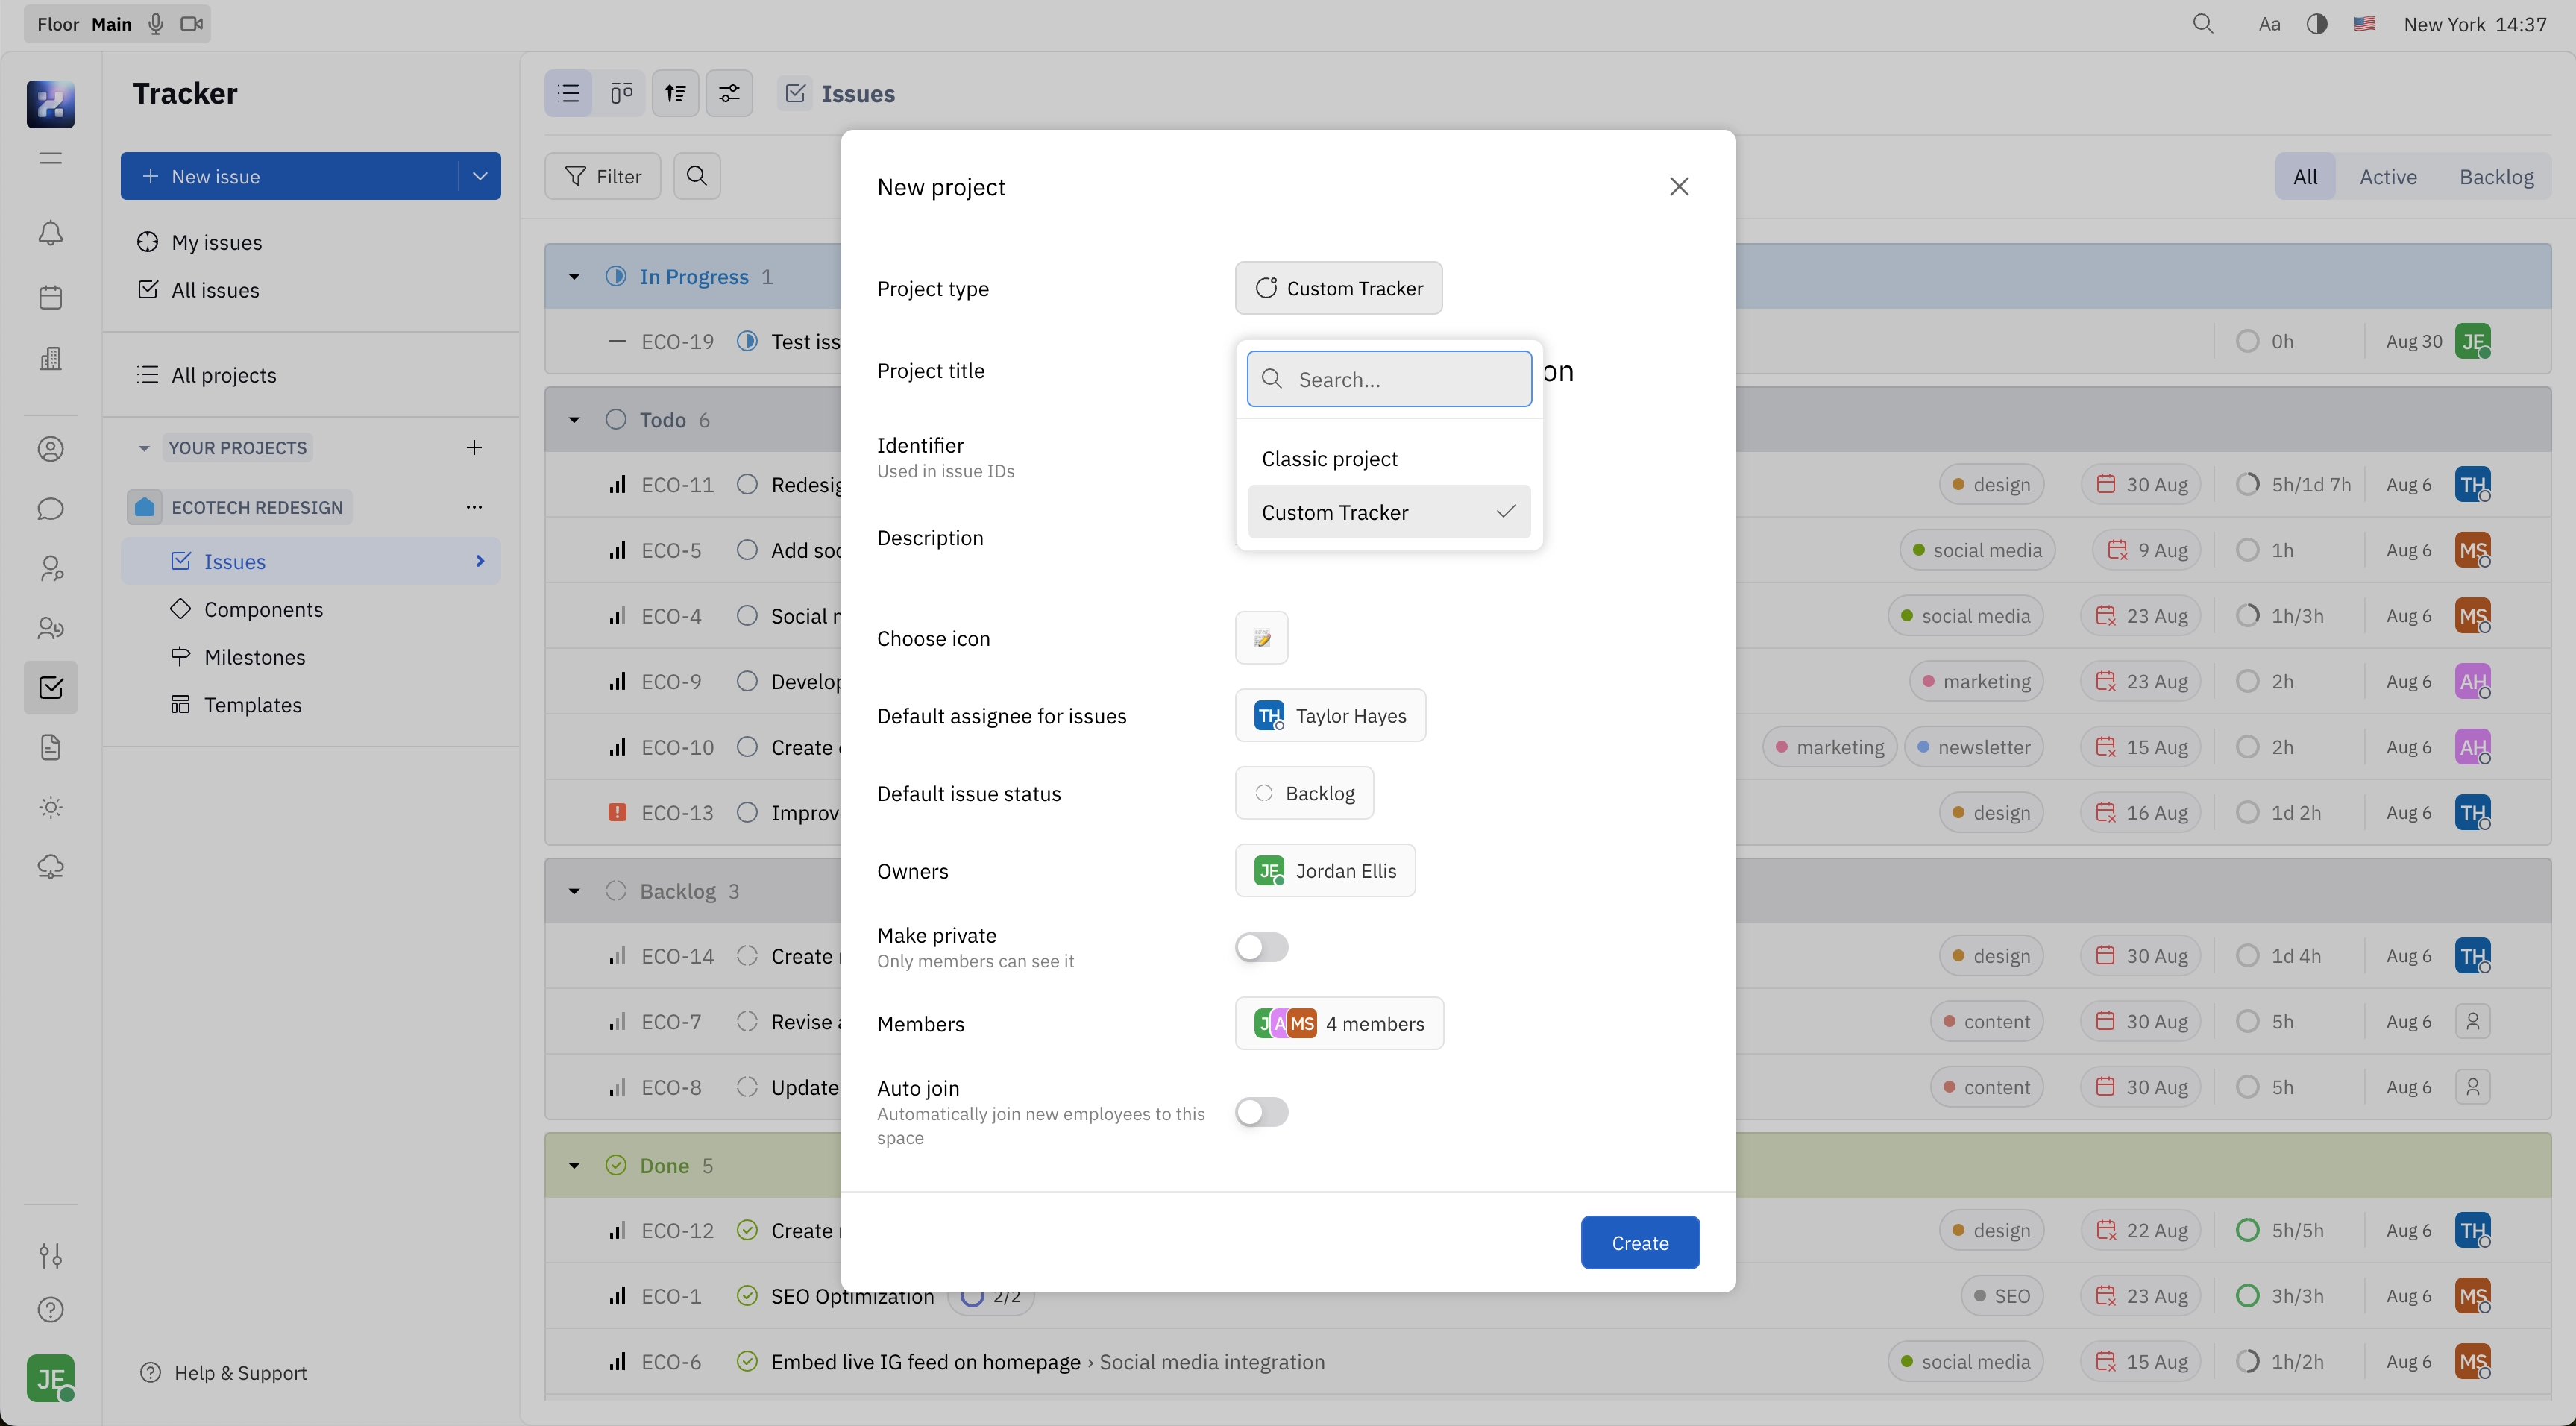
In order to use your custom task types, you’ll need to create a new project based on your new space type. At this time, it is not possible to change the space type used for an existing project.
When creating a new project, select your custom task types from the Project type dropdown menu.
Now, when creating new issues within your project, you’ll find all of your custom task types and process states available to use.